
The Denscot Column
Join us as we explore the many facets of pool ownership!
Chances are very good that if your pool needs a renovation or update, you will know without having to ask a professional. What you may not know is just what about the pool needs to be redone, repaired, or updated. From automation updating, relocating the equipment pad, changing lights, updating the finish, and replacing tiles, all of these fall under the umbrella of renovation. Today let’s look at waterline repair and tile replacement.
Waterline tiles, or a tile line, is most common on plaster pools that have concrete or aggregate finishes. I have on the very rare occasion seen it on a fiberglass pool, although it is uncommon.
Setting the curve for aesthetics, the color, style, size, and in some cases pattern of your chosen tiles can be an important decision. However, this waterline feature serves more than a decorative purpose. Organic debris can tend to float on the surface of the water, and cluster near the sides of the pool. Additionally, as the pool is used, body lotions, and other such materials will also accumulate on the surface of the water and the edges of the pool. Having the surface of the water aligned with these smooth porcelain or glass pool grade tiles ensures that a. these materials are more easily removed from and cleaned out of the pool, and b. that the plaster finish of your pool is not stained by the buildup of these materials. Beauty and function, we love to see it!
Depending on the renovation company you go with, you will have available to you any number of tile lines from different providers. Most common pool tiles are made from porcelain or glass, as these are stronger than your typical kitchen backsplash, and are designed to withstand the weight and pressure of hundreds of gallons of water, regular use, fluctuating weather conditions and of course pool chemicals.
Denscot offers the current lines from National Pool Tile (NPT) and Aquabella, among others. Most often, we see pool perimeter waterlines consisting of 6”x6” tiles, with the occasional client opting for a 6”x12” tile instead. We’ve also installed 12”x24” tiles, and 1”x1” tiles. These 1” square tiles are often installed in 6” or more segments.
 (Image A: 1"x1" tiles on a gunite pool spa combo. Note the grout lines which enhance symmetry and color.)
For any tile replacement project, the pool water needs to be drained at least 4” below the bottom of the tiles. Most renovations requiring tile attention will have broken or missing tiles. If we can match the existing tiles to something in available stock, we may only replace segments of the tiles. In many cases, there are often tiles still stuck in place. Our crew will remove these with a lightweight jack hammer that is strong enough to remove the tiles. Sometimes the entire perimeter of the pool needs to be redone.
Once any or all tiles have been removed, the surface needs to be prepped. We’ll take off chunky dried mortar from the previous tile line, ensuring the any new tiles applied to the wall will be flush with one another, and no tile will stick out further into the pool than his neighbors. We’ll often go in with a shop vac or a steel brush and get rid of the loose debris particles, dust, and any remaining loosened mortar.
If a pool has been completely drained, working on the waterline tiles for any part of the process is infinitely simpler, since we can stand right in the pool and have that clear angle. Sometimes we’ll don some waders, or just get wet. More often than not, you’ll see a pool guy either kneeling or handing over the edge of the pool—no easy feat to tile upside down!
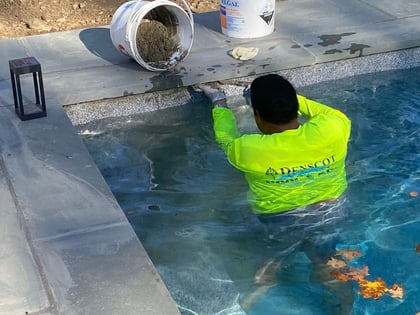
 (Images B, C, and D show the different approaches to grout and tile repair.
If during the prep and installation processes junk falls from the wall into the pool, don’t worry. When you’re finished with all the tile repairs and replacements, you can scoop out the larger pieces of debris. Smaller, finer particles may be able to be filtered out as usual by the pool’s filtration system. If you want to speed up this process, simply vacuum your pool like normal.
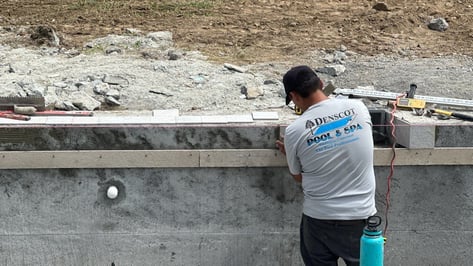
From here it’s as simple as putting a coat of mortar on the back of each tile, and adhering the tile to the pool wall. We use a thin set mortar, and set our tiles close to one another, which removes the need for a traditional grout line. This limits the chance of water getting back behind the tiles. However, some tiles require that grout line, like when we install mosaics or 1” square panels, and that always looks sharp too (see image A). Our crew often runs a pink level line down the length of the wall they are working on to ensure that all the tiles are flush and plumb, with no tiles higher, lower, more deep-set, or jutting out into the pool. (Image E shows a plumb line being used to ensure the coping stones on top of the pool and the tile lines along the inside perimeter of the pool align properly.)
The finished result is a clean, beautiful accent piece! You can explore NPT’s and Aquabella’s online catalogs and check with Denscot to see what new and exciting features we offer on our tile updates. Tile replacement is a simple, affordable way to elevate your pool’s aesthetic and extend your pool’s life.
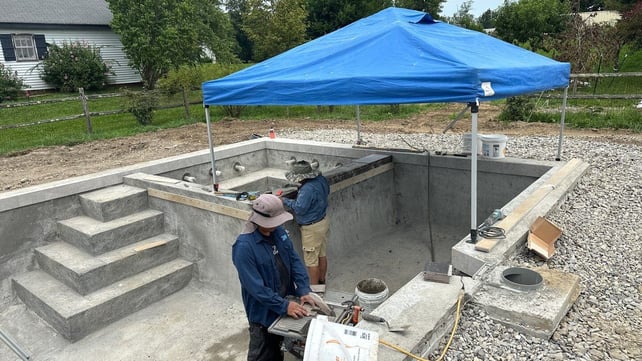
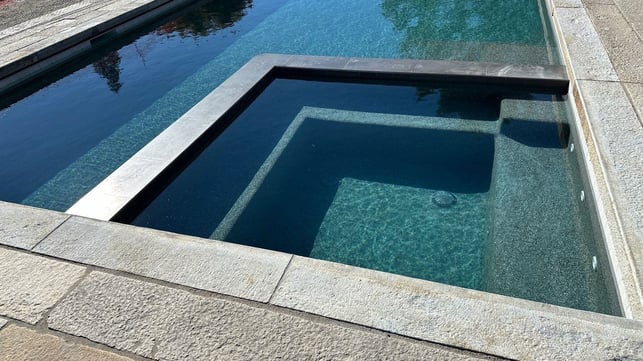
(Images F and G show a recent pool spa combo our crew tiled in the summer/early fall of 2024, and the finished product!)